talla murali

  • Health Tips
  • Tech Tips
  • iphone
  • #91 (no title)

Health Legal Technology

How to Create a Local Windows 10 Account – ExtremeTech

In the five years since Microsoft released Windows 10, it’s made a number of positive changes to the operating system — and demonstrated a distinct willingness to use dark patterns to push users towards using online Windows 10 accounts.

There are certain benefits to using an online Microsoft account to sign in to Windows 10, including cross-device synchronization, automatic logins to MS services, and automatic sync with services like OneDrive. Most of the PCs I build are testbeds, so I don’t use a Windows account for these systems, and I’ve kept my own PC offline as well. Users who are using Microsoft Edge and the Windows Store will benefit more here than users who do not.

Note: While this article is about creating a local account, users with accessibility requirements and multiple PCs may explicitly want to use an MS account in order to automatically synchronize accessibility settings between devices. While this feature doesn’t affect many people, it’s quite valuable for those who need it.

While I prefer to keep my own PC tied to a local account, in the five years since Windows 10 launched we haven’t seen any privacy or security breaches that hit online account users but left local accounts safe. The benefits and drawbacks to using a Microsoft account for Windows 10 come down to how you feel about the idea and your concerns around privacy and security.

Apologies for some of the blur in these shots. You can’t screencap them for obvious reasons.

How to Create a Local Windows Account

You can create a local Windows account in Windows 10 2004 whether you are connected to the internet or not. The instructions for the disconnected option are shown below:

After you choose your keyboard layout and language preferences, the OS will ask you to connect to the internet. In Windows 1904 there was an option to click “I don’t have the internet” at the bottom of the left-hand side of the screen. This was the only way to initiate the local account creation process.

All images can be clicked on to enlarge.


After clicking “I don’t have internet,” the OS will attempt to convince you that creating a local account is a terrible idea. Click “Continue with limited setup.”

This will take you to the local account creation option.

Alternately, you can connect to the internet to complete installation. If you do, the next install page is rather different:

Choose the appropriate response and click “Next.” You’ll get the screen below, which looks like it forces you into an online-only account, but there’s actually an “Offline account” option.

I was genuinely surprised to see this option. Last I’d heard, Microsoft had changed the wording to “Domain join instead,” in a deliberate attempt to confuse users. We’re glad to see Microsoft revert to user-friendly wording.

Click on “Offline account” and the OS will beg you not to do it one last time:

You don’t get any games for using a Microsoft account (though you do get free OneDrive storage).

Click on “Limited Experience” and you’ll land on the create account page instead.

Wait. Guess I lied. Microsoft will, in fact, beg you yet again not to create a local account. Luckily, you can ignore it. Punch in your name and password on the following page and you’re golden.

Be aware that Microsoft likes to tweak the installation process and that it has often tweaked it in ways that made creating a local account harder. The 2004 update is more straightforward than Microsoft has shipped recently, and we’re glad to see it. At the same time, that last “Or better yet,” is tastelessly thirsty. Microsoft has never managed to communicate a cohesive set of features attached to a Microsoft account that would make it a must-use option, so it settles for relentlessly pushing you towards it at every opportunity.

I have two reasons for not wanting a Microsoft account tied to my local PC. First, I prefer to keep my desktop computing and my internet computing separated, and combining a web login with a desktop platform feels strange to me in a way I do not like and do not want. Second, Microsoft’s relentless and downright creepy insistence on the importance of an online account is an enormous turn-off. But both of those reasons are personal preferences/views, and I’m not aware of any security reasons to avoid a Microsoft account.
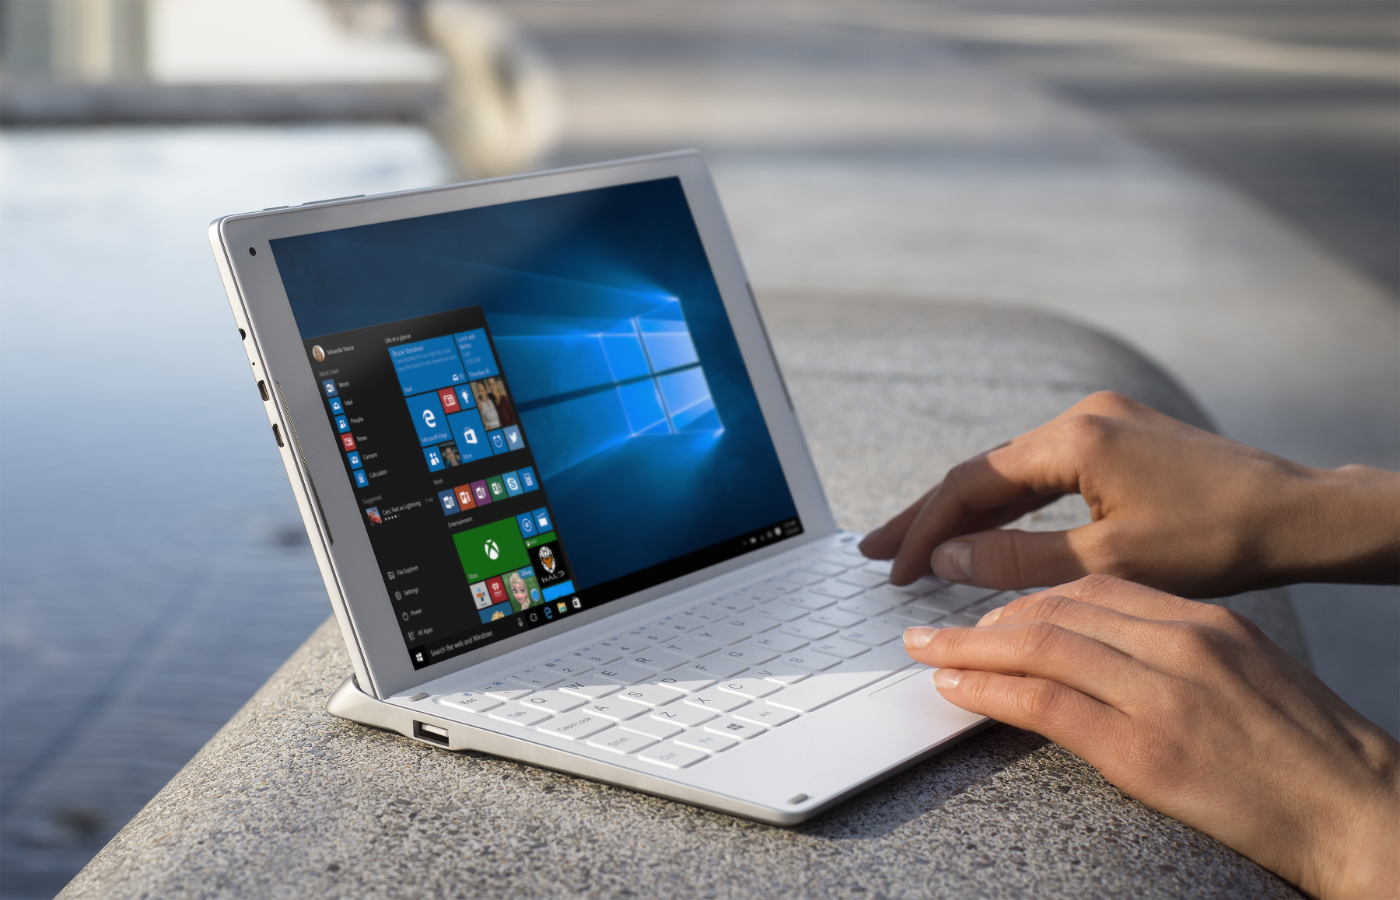
Windows 10’s Feature Experience Pack hints at a more modular future for the OS

Windows 10’s May 2020 update brings several new features and changes to the OS, not all of which will be immediately visible or seem useful to users.

One of these is the Windows Feature Experience Pack that automatically installs with this update as part of Microsoft’s Available Features on Demand.

The feature list includes several well-known Windows programs and components like Notepad, Wordpad, Paint, PowerShell ISE, DirectX Configuration Database, OpenSSH client, and Quick Assistant among others, which Microsoft bundles in the Windows 10 Image file (ISO).

Some of these items, including the new Feature Experience Pack, are now preinstalled in Windows 10 2004 ISO, and users on this version will notice its presence under their PC Settings. Although its purpose isn’t immediately clear, Microsoft is said to have been working on this pack for the past few months, which it says “includes features critical to Windows functionality” and therefore advises against its removal.

Unlike the Windows Experience Pack for previous OS versions (XP, Vista, and 7) that affected Live Messenger and the system theme, ZDNet’s Mary Jo Foley says that this new pack could be a way for Microsoft to bundle together features that will be updated faster than the Windows 10 OS itself.

The current list of programs in the Feature Experience Pack is fairly small and includes updated versions of the Snipping tool, text input panel, and shell-suggestion UI. With this modular approach, Microsoft would now be able to bypass Windows Update and release newer versions of these components, and those added later, through the Microsoft Store.

The effort also appears to be in-line with the company’s revised Windows 10X plans, allowing it to test shell components by bundling them together in future Insider builds and optimizing the OS’ UI/UX for upcoming devices.

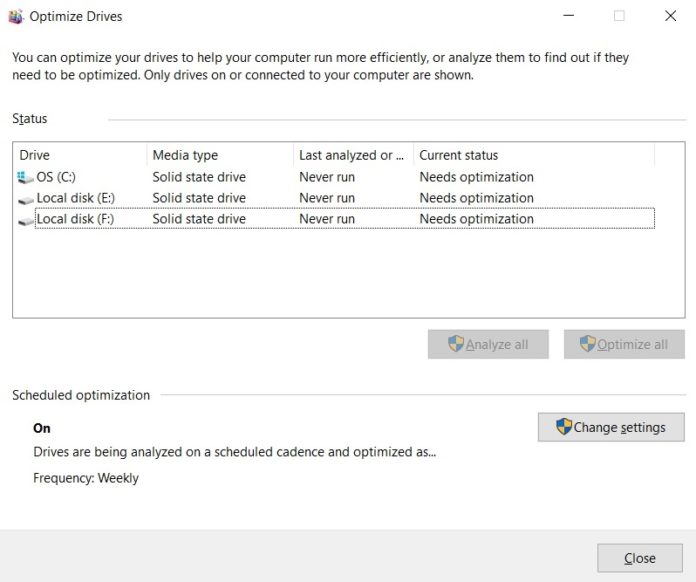
Apart from the Windows Feature Experience Pack and several other changes in version 2004, the update also packs in its usual share of bugs as well. According to Windows Latest, the May 2020 update has caused issues with Microsoft’s Optimize Drives tool.

Although the utility defrags or trims storage media as it should, the program is unable to report the correct status for when the disks were last optimized. While it’s not a problem for users running third-party programs for maintaining drives, it’s potentially concerning for those solely relying on Microsoft’s tool.

The company was made aware of this problem in a previous Insider build, and a fix was included in January’s Preview Build 19551. The issue, however, seemingly slipped through the public build and is now expected to be patched in a future cumulative update.

Android 11 has a cool notification feature the iPhone should totally steal

Google quietly released the first Android 11 beta to the public this week, and you can test it out if you own a compatible device.

The list is very short, as it includes the Pixel 4 series and older models and the OnePlus 8 devices. OnePlus moved quite fast on this one, and other smartphone makers have confirmed they’ll support Google’s Android 11 public beta, including Oppo and Xiaomi.

Android 11 will focus on “people, controls, and privacy,” but not all of the new features will be immediately apparent to the user. In many ways, Google is refining the Android experience with each release, which is exactly what Apple is doing with iOS. Truth be told, these are already old operating systems that offer distinctive features and share plenty of similarities. New, iconic features are increasingly few and far between.

Like other Android releases, Android 11 does borrow some inspiration from the iPhone when it comes to a few features. But it also has a very interesting notification innovation that Apple should copy.

After many years, neither Google nor Apple has figured out how to perfect notifications. Google may be finally onto something here, as Android 11 notifications received a major makeover. All the notifications are automatically distributed and grouped into three separate categories: Conversations, Alerting notifications, and Silent notifications. In truth, only the former really matters, and I’d love to see something like this on the iPhone.

Android 11 will automatically add all the notifications that come from text messages to the Conversations menu, and that’s the first category you’ll see when you check your notifications.

When Steve Jobs unveiled the first iPhone, he said that Apple was introducing “three revolutionary products,” “a widescreen iPod with touch controls,” “a revolutionary mobile phone,” and “a breakthrough Internet communications device.” That was the iPhone in 2007. Many things have changed in the 13 years since.

The point I’m trying to make is that texting is such a crucial element of the current mobile experience that instant messaging notifications are usually the most important ones. What Google did with Android 11 is to group them all together, right on the top of all the other notifications. That way, you’ll never miss any important texts no matter what chat app they come from.

Android 11 animation shows the new Conversation notifications category sitting at the top of the screen. Image source: GoogleGoogle has gone even further than that, allowing you to prioritize conversations inside the Conversations notifications tab seen above. That way, messages from the people who matter most to you will always appear at the top of the list once you mark them as priorities. And some of those notifications will even override do not disturb mode. Moreover, you can change settings on the fly for these chat notifications inside the Conversations shade.

I’m not saying that Apple would have to replicate the Android 11 feature altogether. But grouping instant messaging notifications under a single tab that gets top placement in the notification screen is definitely something to consider.

Some developers already thought about such a feature and created an app that allows you to prioritize notifications on iPhone and iPad. But you’d have to jailbreak your iOS device in order to run Priority.

10 Signal tips for iPhone, Mac and iPad users

Enterprises, government officials or individuals anyone who seriously wants to secure their communications uses the cross-platform Signal service.

Here are a dozen tips to help you get more from using this on your iPhone.

Secure by design

Signal is built to be secure, so much so that the European Commission this year instructed staff to begin using the encrypted messaging app for public instant messaging. Encrypted emails and highly secure document exchange systems are also used.

What makes Signal secure?

It’s open source, uses end-to-end encryption by default and doesn’t store message metadata or use the cloud to back up messages. This makes the content of your messages really hard to intercept (though I hesitate to say impossible, as we live in difficult times). iMessage also offers end-to-end encryption, but is sadly not cross-platform, which gives Signal the edge.

One important caveat:

If you are messaging with someone who is not using Signal, then nothing is encrypted. Everyone in a chat should be using it to benefit from this security, particularly if you’re exchanging valuable data.

Signal has a selection of useful features, some of which I explain in this piece. It’s free and works on the iPhone, iPad, Macs, Windows PCs, Linux hardware and Android devices.

1: Easy transportation

Signal recently introduced a new iOS tool that makes it possible to securely transfer Signal data (messages, archived chats) to new iPhones.  That’s a big benefit if you upgrade your device and it’s very simple to use:

  • Install Signal on your new device.
  • Open the app and select Transfer from iOS Device.
  • A QR code will appear.
  • Take your old device, select Next and scan the QR code.
  • Signal will transfer your data from your old to your new iPhone.

2: Blur your pictures

Signal is developing a new tool to blur faces in images you send using the service. This is designed to help you and those around you retain your privacy. You access this tool using a new round icon (it looks like a PS controller) at the top of an image – tap it to activate and Signal will blur any faces it finds in an image.

3: Set it up right

When you create a Signal account, the service will require that you provide a phone number, which becomes your username.

To avoid sharing your actual number, it’s possible to use a Google Voice number – just log-in to Voice with a Google account and select a new number. You’ll need to provide an actual number for Google’s verification process, but can then use the Voice number to further protect your Signal.

You should also turn off Notifications for Signal on your iPhone. This will prevent messages appearing on your Lock screen. You do this in Settings>Notifications>Signal>Show Previews>Never.

4: Password protection

You can add another layer of security to Signal if you enable biometric or passcode access to get into the app. You do this in the Privacy section inside the app, where you switch Screen Lock on. Once it is on, you’ll need to enter your passcode or use Touch or Face ID to open up the app.

5: Disappearing messages

Signal has this cool feature that lets you make messages disappear on both your own and other people’s devices – though you need to work through each person in a messages thread to make it work:

  • In a message chat, tap the name of the contact (you need to repeat this process for each one).
  • Toggle over Disappearing Messages and set the amount of time you want them to exist before they digitally disappear.
  • You can choose between 5 seconds and one week.
  • A timer icon shows on the thread. Anyone who sees this can use this icon to change the time, or disable the feature.

This isn’t a foolproof way to protect your conversations, but it helps.

6: Block this chat

Tired of endless alerts from one of your contacts? Signal lets you block them:

  • Tap their name in the chat and toggle “block this user.”
  • Or visit Privacy>Blocked>Block this user and select the person you don’t want to hear from.

7: Send an image you can see only once

Signal lets you share an image with another user that only works once before it disappears on both your own and the other device. Select the image and then tap the icon you see on the lower left corner – it should change to 1x. When you send it the image will only be viewable once before being deleted from both devices.

8: Secret Notes

Signal has something called Note to Self. This is basically a built-in ‘Note to Self’ contact that you can text, send photos or voice notes to, or anything else. You can use this as a slightly secure equivalent to Notes.

9: Use Keyboard shortcuts

Did I mention Signal also works on a Mac? When it does, you get access to a number of useful keyboard shortcuts, all of which you can learn thanks to this handy reference card.

10: Verify the chat

Signal has a tool that lets you check against man-in-the-middle attacks when someone sits in the middle of your conversation. For each call, the Signal app displays two words on the callers’ phone screens – if the words are different on both devices then something is wrong. Here’s a video that explains how the feature works.

Please share your Signal tips with me so I can add them to this piece.

Please follow me on Twitter, or join me in the AppleHolic’s bar & grill and Apple Discussions groups on MeWe.

Copyright © 2020 IDG Communications, Inc.

10 Signal tips for iPhone, Mac, iPad users

Enterprise, government or individuals, anyone who seriously wants to secure their communications uses the cross-platform Signal service.

Here are a dozen tips to help you get more from using this on your iPhone.

Secure by design

Signal is built to be secure. So much so in fact that the European Commission this year instructed staff to begin using the encrypted Signal messaging app for public instant messaging. Encrypted emails and highly secure document exchange systems are also used.

What makes Signal secure?

It’s open source, uses end-to-end encryption by default and doesn’t store message metadata or use the cloud to back-up messages.

This makes the content of your messages really hard to intercept (though I hesitate to say impossible, we live in difficult times). iMessage also offers end-to-end encryption, but is sadly not cross-platform, which gives Signal the edge.

One important caveat:

If you are messaging with someone who is not using Signal then nothing is encrypted. Everyone in a chat should be using it to benefit from this security, particularly if you’re exchanging valuable data.

Signal has a selection of useful features, some of which I hope to explain in this piece.

Signal is free and works on iPhone, iPad, Mac, Windows, Linux and Android.

1: Easy transportation

Signal recently introduced a new iOS tool that makes it possible to securely transfer Signal data (messages, archived chats) to new iPhones.  That’s a big benefit if you upgrade your device and it’s very simple to use:

  • Install Signal on your new device.
  • Open the app and select Transfer from iOS Device.
  • A QR code will appear.
  • Take your old device, select Next and scan the QR code.
  • Signal will transfer your data from your old to your new iPhone.

2: Blur your pictures

Signal is developing a new tool you can use to blur faces in images you choose to send using the service. This is designed to help you and those around you retain your privacy. You access this tool using a new round icon (looks like a PS controller) at the top of an image – tap it to activate it and Signal will blur any faces it finds in an image.

3: Set it up right

When you create a Signal account the service will require you provide a phone number, which becomes your username.

To avoid sharing your actual number it’s possible to use a Google Voice number – just log-in to Voice with a Google account and select a new number. You’ll need to provide an actual number for Google’s verification process, but can then use the Voice number to further protect your Signal.

You should also turn off Notifications for Signal on your iPhone. This will prevent messages appearing on your Lock screen. You do this in Settings>Notifications>Signal>Show Previews>Never.

4: Password protection

You can add another layer of security to your use of Signal if you enable biometric or passcode access in order to get into the app. You can do this in the Privacy section inside the app, where you switch Screen Lock on. Once it is on you’ll need to enter your passcode or use Touch or Face ID to open up the app.

5: Disappearing messages

Signal has this cool feature that lets you make messages disappear on both your own and other people’s devices – though you need to work through each person in a messages thread to make it work:

  • In a message chat tap the name of the contact (you need to repeat this process for each one).
  • Toggle over Disappearing Messages and set the amount of time you want them to exist before they digitally disappear.
  • You can choose between 5-seconds and one week.
  • A timer icon shows on the thread. Anyone who sees this can use this icon to change the time, or disable the feature.

This isn’t a foolproof way to protect your conversations, but it helps.

6: Block this chat

Tired of endless alerts from one of your contacts? Signal lets you block them:

  • Tap their name in the chat and toggle block this user.
  • Or visit Privacy>Blocked>Block this user and select the person you don’t want to hear from.

7: Send an image you can see only once

Signal lets you share an image with another user that only works once before it disappears on both your own and the other device. Select the image and then tap the icon you see on the lower left corner – it should change to 1x. When you send it the image will only be viewable once before being deleted from both devices.

8: Secret Notes

Signal has something called Note to Self. This is basically a built-in ‘Note to Self’ contact which you can text, send photos or voice notes to, or anything else. You can use this as a slightly secure equivalent to Notes.

9: Use Keyboard shortcuts

Did I mention Signal also works on a Mac? When it does work on a Mac you get access to a number of useful keyboard shortcuts, all of which you can learn thanks to this handy reference card which you will find here.

10: Verify the chat

Signal has a tool that lets you check against man-in-the-middle attacks when someone sits in the middle of your conversation. For each call, the Signal app displays two words on the callers’ phone screens – if the words are different on both devices then something is wrong. Here’s a video that explains how the maths behind the feature works.

Please share your Signal tips with me so I can add them to this piece.

Please follow me on Twitter, or join me in the AppleHolic’s bar & grill and Apple Discussions groups on MeWe.

  • « Previous Page
  • 1
  • …
  • 3
  • 4
  • 5
  • 6
  • 7
  • …
  • 28
  • Next Page »

Copyright © 2025 · Executive Pro Theme on Genesis Framework · WordPress · Log in