talla murali

  • Health Tips
  • Tech Tips
  • iphone
  • #91 (no title)

Health Legal Technology

How to make the most of Android’s new Assistant add-on

Sometimes, it’s the smallest-seeming announcements that have the biggest real-world impact. And there’s no better example of that than a decidedly muted Android.

Assistant-related rollout plopped out by Google just before the U.S. holiday weekend.

You’d be forgiven for failing to notice — or maybe for seeing a passing mention of the news and then just casually scratching your fibula and moving on. Do me a favor, though, and pause all itch-related activity for a moment, because this announcement truly does deserve your attention — especially if you’re a fan of potential-filled productivity boosters (and who among us isn’t?!).

The item in question is an innocuous-seeming little somethin’ called Action Blocks — about as uninspiring of a name as one could imagine, I know. And if most of us needed more reason to ignore it, it showed up as part of a meandering Google blog about “accessibility updates” — which, suffice it to say, isn’t exactly the type of topic that screams “HEY! THIS IS A TIME-SAVING, EFFICIENCY-ENHANCING FEATURE FOR EVERYONE!”

But it should. And not only because the idea of a screaming topic is hilarious.

As readers of my newsletter know, I’m incredibly excited about the arrival of Action Blocks and the possibilities the new system opens up for every single one of us. Some of Android’s most powerful productivity tools are designed with accessibility as their primary purpose but end up having a much more universal impact, once discovered — and this is another such gem to add onto that list.

The key, as usual, is simply knowing how to tap into its potential and take advantage of what it can do for you. And in about five minutes, you’ll have all that knowledge.

Google’s Assistant Action Blocks: The basics

We’ll get into the advanced Assistant/Action Blocks possibilities in a second. First, let’s cover the basics of what the Action Blocks add-on is actually all about — and what it’s intended to do at its most basic level.

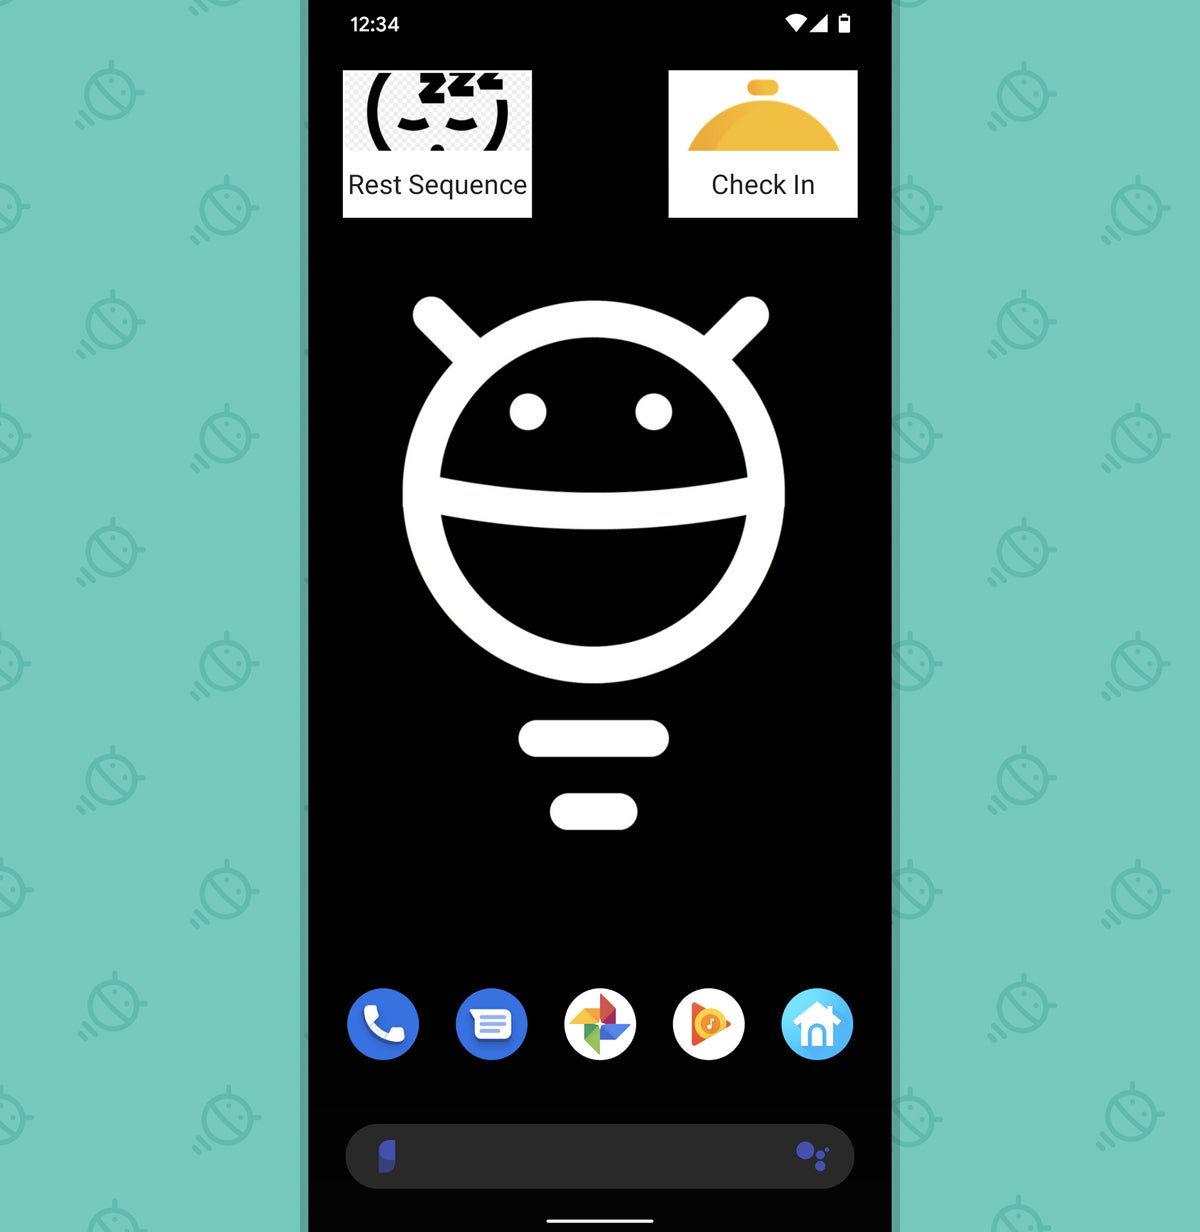
So here you have it: Action Blocks is a standalone Android app that lets you create custom Assistant widgets for your Android phone. Basically, anything you could ask Assistant to do can be turned into an Action Block button and placed on your home screen for easy one-tap access.

Now, couldn’t you just speak out loud to Assistant and ask it to do that very same stuff? Why, yes: Of course you could, you astute little aardvark. And if you like talking to your technology all the time and find that to be an effective method of getting things accomplished, then this new system might offer little in the way of meaningful value for you.

But personally, I tend to find talking to Assistant to be awkward, annoying, and ineffective more often than not. Sometimes, you’re just not in a position where speaking aloud to your phone is ideal — if, say, you’re in a noisy environment, other people are around you, or you have any sense of shame and realize how much of a dillweed you sound like when you talk to inanimate objects. And sometimes, it’s just plain faster and more efficient to tap a button on the screen.

On that note, there’s the plain and simple fact that Google Assistant and virtual assistants in general just aren’t all that great at understanding us. How many times have you tried to get your phone or another Assistant device to do something, only to find yourself sighing loudly and shouting “GOOGLE, STOP!” while the device rattles off the definition for “wattle” instead of telling you the weather?

And then there’s the issue of having multiple Assistant devices within earshot and having the wrong one pick up your voice and respond — an especially irksome occurrence when you’re trying to do something on your phone and a nearby speaker answers instead and informs you it can’t perform that function. (If only there were some super-simple fix Google could give us for that — hmmmmm…)

So that’s where an Action Block widget can come in handy: by granting you a dead-simple, no-speaking-required way to activate an advanced function on your phone with zero room for error. One tap, and it’s done.

It’s simple, it’s effective, and it’s clever. And it fills in a massive gap in what Assistant’s able to do and how easily you can use it — in some seriously advanced ways that aren’t immediately obvious.

Let’s get into ’em, shall we?

Action Blocks pro tip #1: Don’t limit yourself to single commands

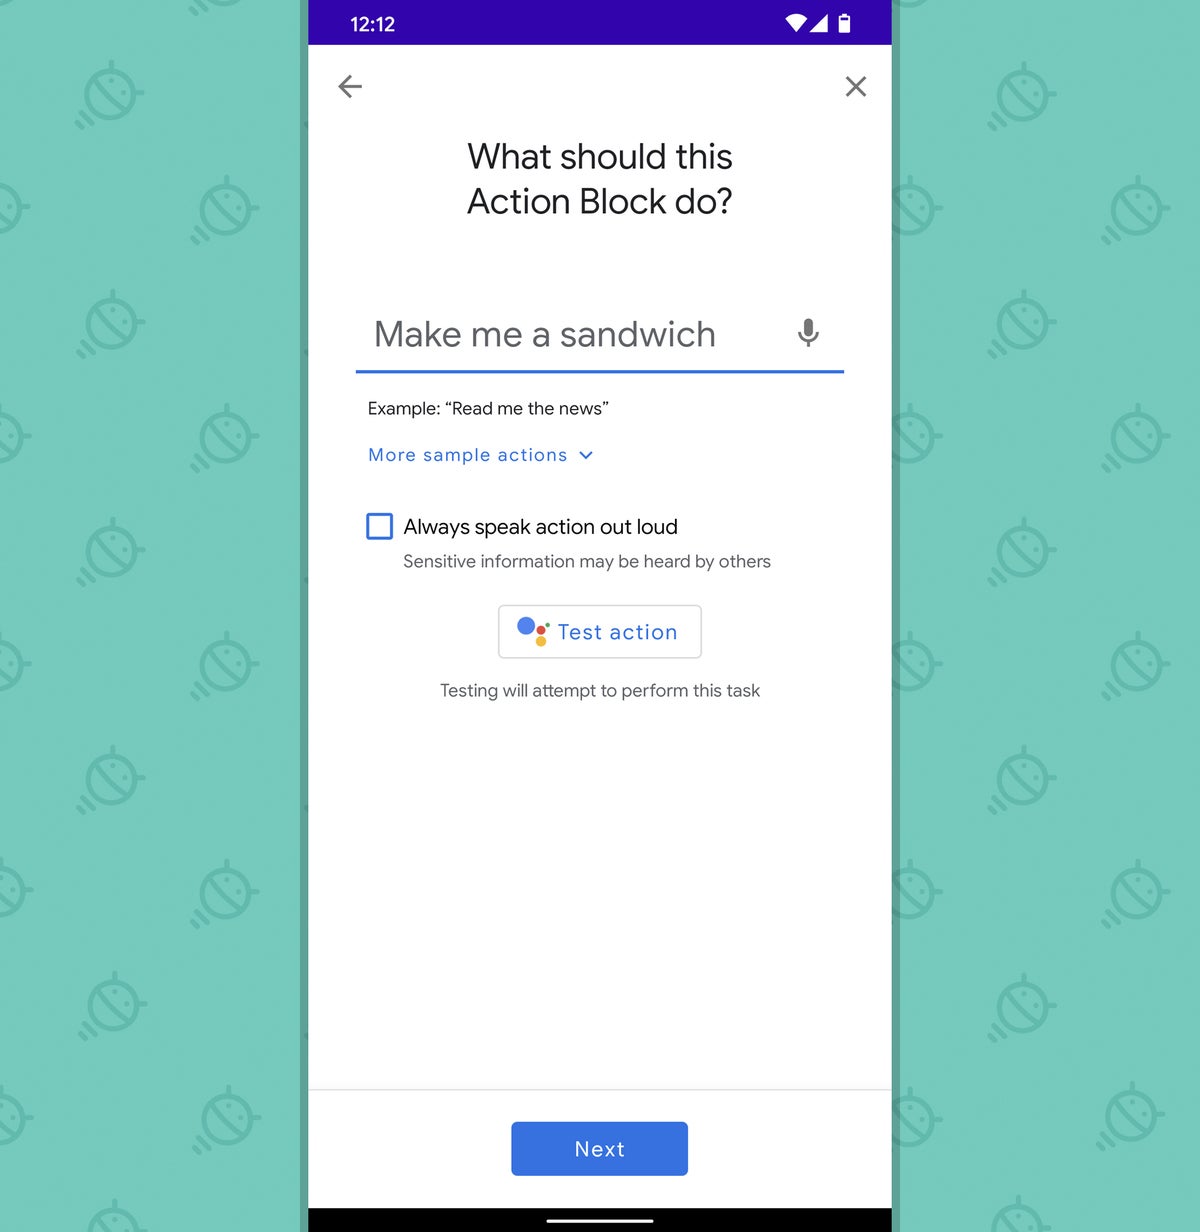
First up: When you open the Action Blocks app and tap the Create Action Block button, you’ll see a list of common actions you can use within your Google Assistant widget — along with the option to create a custom action.

That “custom action” option is what you want. Tap it, and you’ll be taken to a screen that looks something like this:
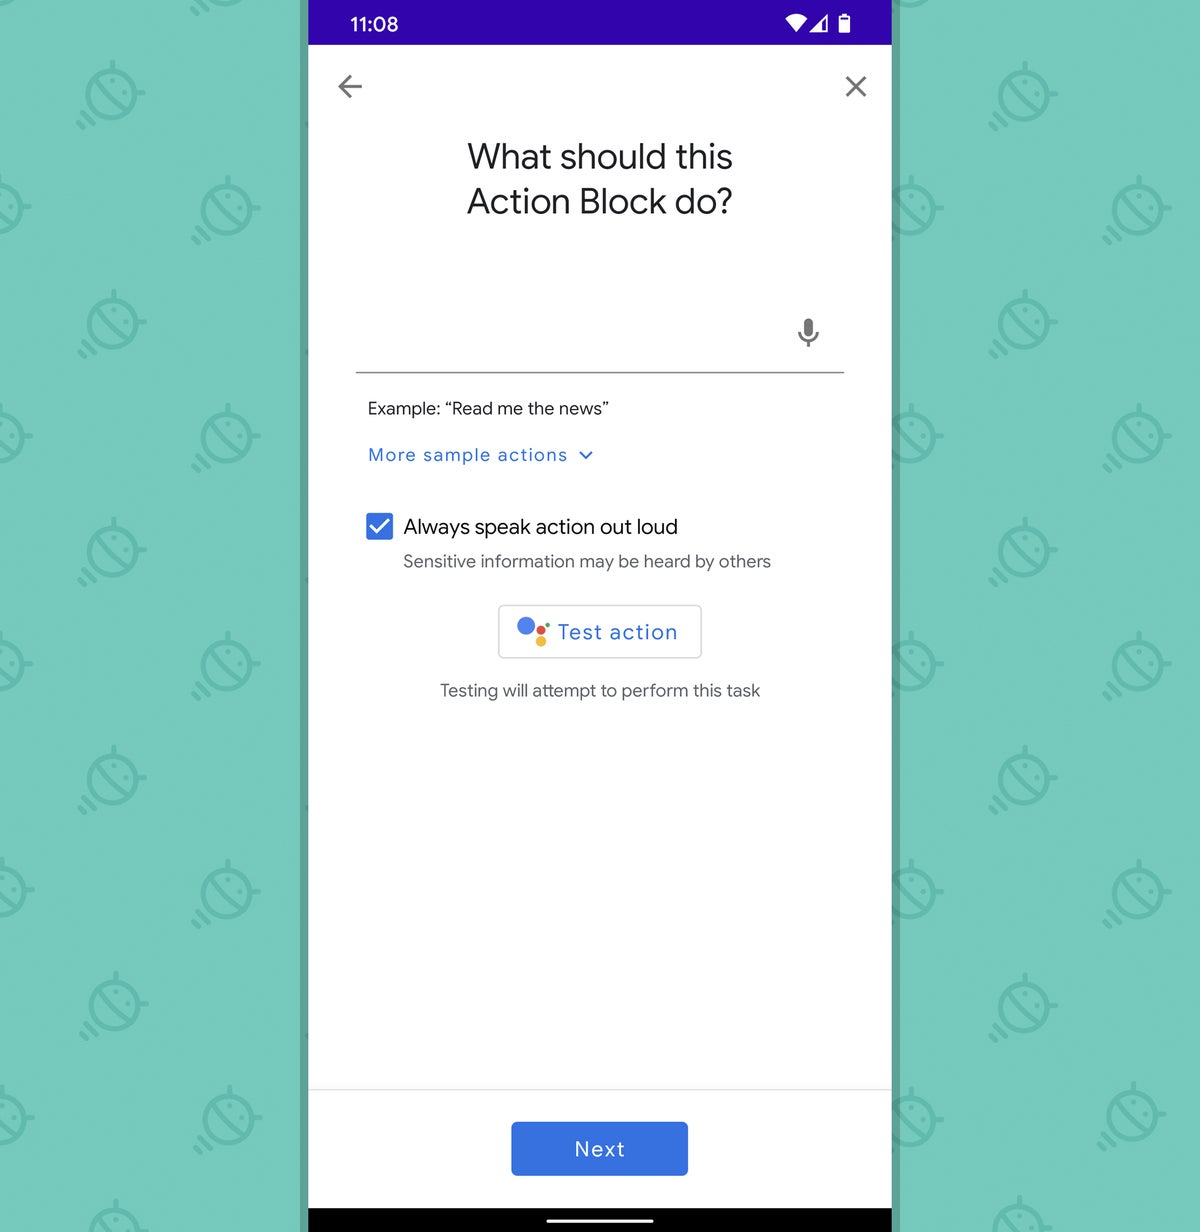
Android, Google Assistant Action Blocks (1)JR

Easy enough, right? You can just type in any command you’d give to Google Assistant — “Turn on Bluetooth,” “Start Do Not Disturb mode,” “Set my ringer volume to 10%,” or whatever — and then move on. But that’s missing out on the hidden power in this part of the process.

You’d never know it from looking, but Action Blocks actually lets you string together multiple Assistant commands and put ’em into a single button. So if, for instance, you wanted to make a simple one-tap button you could press to catch up when you start your day or come out of a meeting (or even a siesta disguised as a meeting), you could type in combination commands like these:

  • Take my phone off silent and read my reminders
  • Take my phone off silent and read my messages
  • Take my phone off silent and what’s my next meeting

Or maybe you want a button for switching your phone’s settings over to a mode that makes sense for driving:

  • Turn on Bluetooth and set my media volume to 80%

You get the idea. But you don’t have to stop with two commands, either: You can string together even more Assistant actions and then have a single button on your home screen trigger all of ’em for you. The key is just to use the word “and” in between whatever Assistant actions you want.

So maybe you’d enjoy an even more elaborate button for catching up after a brief bout of being offline:

  • Take my phone off silent and what’s my next meeting and read my messages

Or maybe you’d want a home screen widget that preps your phone for a focus mode in which you play some manner of music or white noise, eliminate outside distractions, and inform your (human) assistant, colleague, or friendly neighborhood marmot that you’ll be away for a while:

  • Set my media volume to 80% and turn on Do Not Disturb and text Mortimer on his mobile I’ll be offline for the next 20 minutes. Please hold my calls.

Or, for one more practical example, maybe you’d like a one-touch button on your home screen to get ready for a rest:

  • Put my phone on silent and set an alarm for 7am and play babbling brook sounds

Whatever you do, you’ll be a mere few taps away from naming and styling your widget however you want and placing it onto your home screen for easy ongoing access.

Android, Google Assistant Action Blocks (2)JR

Once you wrap your head around the Action Blocks basics and become aware of the system’s hidden support for stringing together multiple commands, the possibilities are practically endless. Just be sure to use the option within the app to test your commands before saving your creation; Assistant in general can be a little finicky, and sometimes it takes a teensy bit of experimentation to figure out the right phrasing or the most effective order for any given sequence.

(One other tiny tip: Think about unchecking the box for “Always speak action out loud.” Unless you’re actually using this for accessibility purposes, having the app read out every command it’s completing is gonna get old fast.)

And speaking of combining commands together…

Action Blocks pro tip #2: Don’t limit yourself to a single device

In addition to allowing you to bundle multiple Assistant commands into a single button, Google’s Action Blocks add-on will let you perform tasks on both your phone and another Assistant-connected device in one fell swoop. And whether you’ve got a Assistant speaker in your office or some smart lights and other connected tech in your home work environment, there’s lots of useful stuff you can do once you realize what’s possible.

Let’s say, for instance, you’re working from home, and you want to take a quick break for some quiet thought and reflection. You could create an Action Block with the following command:

  • Put my phone on silent and play classical music on my office display

Provided you actually have a Smart Display in your office, that one button will prep both your phone and the screen for that special moment.

If you have more connected devices, you can take the same concept even further:

  • Turn the office lights on and set the thermostat to 72

Or you can get really wild:

  • Put my phone on silent and turn off the office lights and play nature sounds on my office display

Just start thinking about all the things you’d like to accomplish with any Assistant-associated devices in your vicinity, and then let Action Blocks do the heavy lifting.

Action Blocks pro tip #3: Don’t forget about routines

If you ask me, Google Assistant’s Routines feature is kind of clunky and confusing — not to mention woefully buried and out of sight. If I were to guess, I’d say somewhere in the ballpark of 90 to 95% of Android owners probably never use it.

But hey, you’re reading this column! You’re clearly not an ordinary user. So if you do have some Assistant routines set up or maybe just want to try messing around with ’em, take note: You can set up an Action Block button that’ll trigger any existing routine on your account. Just open up the Action Blocks app, choose the custom command option, and type in your routine’s launch phrase as the Action Block command.

Android, Google Assistant Action Blocks (3)JR
If only this would work…

Now you’ve got a faster, more foolproof way to trigger the same Assistant sequences you’ve already created. Not bad, eh?

And one more thing to mention…

Action Blocks pro tip #4: Don’t stop with Assistant’s native capabilities

This last tip takes us slightly deep into geeky waters, but it opens up even more interesting options with Assistant and Action Blocks:

If you think of something Assistant itself can’t do on its own, there’s a decent chance you can still accomplish it by way of a free (and very reputable) third-party service called IFTTT.

IFTTT is short for “If This, Then That.” It ultimately just acts as a middleman to connect different web-based services together. You can find a list of ready-made recipes for making Assistant work with different external apps and systems on this page — and if you find anything that stands out to you as seeming worthwhile, all you’ve gotta do is sign up for or sign into the service, activate and set up the recipe once, and then create an Action Block using its custom command.

So, for instance, I used this IFTTT sequence to link my Assistant account with one of my Slack workspaces. Now, whenever I tell Assistant to “tell Slack” something, it posts my message into a specific channel that I specified within the IFTTT setup.

That means I can create an Action Block that’ll post a specific, common message I send on Slack with just a single tap on my home screen:

  • Tell Slack Got hot sauce on my pants, will be 5-10 late to the meeting!

Or I can create an even more advanced Action Block button with multiple commands strung together — maybe for taking a break and letting co-workers know I won’t be reachable for a while:

  • Put my phone on silent and tell Slack FYI, party people: I’ll be offline for the next 30 minutes.

Or we could go just positively bonkers and string a few different things together with that same Slack action:

  • Put my phone on silent and set an alarm for 7am and tell Slack Signing off for the night, suckers.

Ahh — so much accomplished with one simple tap. Now, that’s what I called effective assistance.

Sign up for my weekly newsletter to get more practical tips, personal recommendations, and plain-English perspective on the news that matters.

First portless iPhone might follow the iPhone 12

The future of smart devices is wireless. The dawn of 5G and Wi-Fi 6 will make data transfer faster than ever when an internet connection is present.

But moving large chunks of data between devices without a wired or internet connection to intermediate the transfer could soon become a reality. Moreover, next-gen wireless charging tech could work across long distances, and make charging pads forgotten. It may sound like tech from sci-fi movies, but the building blocks of all these wireless technologies are already in place. And Apple might make the next move towards that future with the kind of baby step we all expect to see soon, an iPhone that features no ports whatsoever.

The iPhone 12 that’s due this fall could be one of the last iPhone generations to feature ports of any kind. A new report says the iPhone 12 will not make the switch to USB-C, as some people might hope. Apple is sticking with Lightning for at least one more year, as one of next year’s iPhone 13 models could ditch the Lightning connector as well.

Leaker Fudge, who posted in early April a schematic of the purported iPhone 12 Pro design, complete with a smaller notch and a LiDAR camera on the back, took to Twitter to suggest that Apple had a USB-C prototype for the iPhone 12.

Shame the USB-c prototype iPhone 12’s arent making it to production. 1 more year of lightning 🥳😭

Oh well, at least smart connector on 13 series

— Fudge (@choco_bit) May 25, 2020

The leaker’s mention of a smart connector for the iPhone 13 may be about an iPhone 12 design leak that circulated online recently, showing a phone with an iPad-like quick connector on the side of the phone where the SIM card goes.

In a follow-up tweet, Fudge said that the smart connector won’t be used for charging purposes, as wireless charging will be the portless iPhone 13’s primary way to recharge the battery.

for clarification, smart connector thing on 13 series wont be the intended way to charge. Youll be expected to go wireless charging mainly. D6x series (iphone 13 series) hasnt really begun proper development yet so iphone magsafe more of a plan atm. Portless is coming either way

— Fudge (@choco_bit) May 26, 2020

Well-known leaker Jon Prosser said in mid-April that the iPhone 12 won’t feature a smart connector as seen in some leaks, adding that the feature will be found on a future prototype “for charging on a portless iPhone.”

No smart-connector on iPhone 12.

No doubt that it may be on a future prototype — but it’ll be used for charging on a portless iPhone.

Definitely no Apple Pencil support.

— Jon Prosser (@jon_prosser) April 19, 2020

Prosser also said at the time that the iPhone 12 will not make the switch to USB-C, and noted that “Apple will go portless before they go USB-C.” Technically, Apple went USB-C for the iPad Pro, but that’s a different story.

I feel like I shouldn’t have to say this, but no — there’s absolutely not USB-C in iPhone 12.

Apple will go portless before they go USB-C.

— Jon Prosser (@jon_prosser) April 18, 2020

The YouTuber turned Apple leaker said a few days ago that one portless iPhone is coming next year, excluding the possibility for Apple to use USB-C anytime soon. “Eventually, they’ll all be portless,” he said.

☝️ yep.

One portless iPhone coming next year.

Never USB-C. Eventually, they’ll all be portless.

— Jon Prosser (@jon_prosser) May 13, 2020

Prosser explained in one of his scoops that Apple’s seemingly abandoned AirPower universal charger is essential for the future of the iPhone, and that’s why Apple hasn’t given up on launching such a device.

Separately, analyst Ming-Chi Kuo said in a research note that Apple would drop the Lightning connector from 2021 iPhones, without specifying at the time whether Apple would go portless or USB-C.

There are other signs that a portless iPhone is in the making. Apple is rumored to ditch the EarPods for the iPhone 12, a move that’s meant to boost AirPods sales. But it can also be an indication of what’s to come in the not so distant future. Apple is also working on faster short-range wireless connectivity that could come in handy on a portless iPhone.

How to block the Windows 10 May 2020 update, version 2004, from installing

Things change — sometimes for the better. There are two big changes in the Windows 10 world that come into focus with Windows 10 version 2004:

  • Updates now appear to run on a tick-tock model: The Windows 10 update in the first half of the year contains major changes; the update in the second half of the year holds only minor changes. Microsoft hasn’t committed to the new tick-tock model, but all evidence points in that direction.
  • Microsoft doesn’t cram a new version of Windows down your throat, like it used to. (Don’t get me started on the surprise! forced 1703 to 1709 upgrades.)

Windows 10 version 2004 continues in the same mode, but with an unusual difference. Instead of getting a full-fledged “tick’s” worth of changes, what we’re seeing is more of a whimper. In addition to the usual promises of faster and better, and maybe a Search that actually works, we’re also seeing a demotion (er, realignment) of Cortana, better Windows Subsystem for Linux, and Windows Hello working in Safe Mode. Be still my beating heart.

There’s a reason why: Microsoft has realigned the Windows 10 delivery schedule to sync up with Azure. Don’t ask me why: Tail, meet dog. In this particular case, the big new version of Windows 10 delivered in May 2020 was actually finalized in December 2019.

While we’re going through the usual crowdsourced beta testing, you should take these steps to make sure you aren’t accidentally swept up in an unwanted upgrade.

Step 1. What version are you running?

The method for blocking unwanted version upgrades varies greatly depending on which version of Windows 10 you’re running. To find out, click Start > Settings (the gear icon) > System, and on the left side at the bottom, click About.

You’ll see something like this screenshot.

Windows 10 Settings - System - About IDG

Take note of both the edition (Pro, Home, Education, Enterprise) and the version.

If your computer is connected to a network that has an update server (such as WSUS or SCCM), you don’t have any control over your version — the network admin gets to sweat this one out. But if you’re connected to a normal network, or not connected at all, read on. Enterprise and Education users who aren’t connected to a network with an update server can follow along with the Pro instructions below.

Step 2. If you’re on version 1803, it’s time to move on.

For Home and Pro customers, the last security updates for Windows 10 version 1803 arrived on November 12, 2019. That means you’ve been running without a net — and Microsoft has been trying to push you onto a newer version — for half a year.

It’s time to move on from 1803. I, personally, have moved to version 1909, a.k.a. the Windows 10 November 2019 Update. You may want to hedge your bets a bit and go to version 1903, but for several months now, all of the significant bugs documented in version 1909 are also in version 1903. There are many ways to move from 1803 to 1909, but the easiest is to back up everything and follow the steps in the Windows Update Assistant.

Step 3. If you’re on version 1809, you have a tough decision to make.

Last month, Microsoft granted a reprieve to Windows 10 version 1809 Home and Pro customers. Officially, 1809 will continue to receive updates until November 10, 2020. The official version of the announcement attributed the change to the pandemic. Many folks noted that there are lots of paying customers still stuck on 1809.

Staying on 1809 is relatively easy if you’re using Windows 10 Pro. Using an administrator account, click Start > Settings > Update & Security. Click the link marked Advanced options. Make sure you have the Channel and feature update deferral set as shown in the screenshot below.

Windows 10 Settings - Update and Security - Advanced Options IDG

With the Channel and feature update deferral settings like that, Microsoft won’t try to push you onto Windows 10 version 1903 or 1909 until you’re ready to give the go-ahead. (Unless the company, uh, “accidentally” forgets to honor its own settings, as it has several times in the past.)

Just remember: Don’t ever click Check for updates.

For Windows 10 version 1809 Home users, the only way to take control of version updates on your machine is to move to 1903 or 1909 and proceed to Step 4. To move to 1909, remove all updating blocks (for most people that means turning off metered connections), and let Windows Update take its time and do its thing. But don’t click Check for updates.

As Windows 10 1809 reaches end of support on November 10, 2020, you can expect that Microsoft will start bending the rules a bit and push harder to get you onto 1909 or 2004 (or some future version). We’ll keep you posted on those developments at Computerworld.

Step 4: If you’re on version 1903 or 1909, don’t click that link.

If you’re running Windows 10 version 1903 or 1909, sooner or later you’ll see a Windows Update notice (Start > Settings > Update & Security) like the one in the screenshot below.

Windows 10 Settings - Update and Security - Download and install IDG

The notice will appear in Windows 10 1903 and 1909 Home and Windows 10 1903 and 1909 Pro. (Yay!)

If you want to avoid installing Windows 10 version 2004, don’t click the Download and install link. It’s that simple. If you avoid clicking the Download and install link, you’ll continue on 1909 (or 1903) forever — or until MS decides it needs to push you off, whichever comes first.

Too bad Microsoft didn’t decide to delay Windows 10 version 2004 until the work-from-home world was in a better space, but them’s the breaks. Curtail your clicking finger, avoid the shiny new version siren call, and you’ll be relatively stable for months to come.

If all your iPhone apps suddenly need updates, you’re not alone

Last Wednesday, Apple released the final versions of iOS 13.5 and iPadOS 13.5 to the public.

The updates contained the Exposure Notification API that developers can use to create contact tracing apps for the novel coronavirus as well as a simplified unlock process for Face ID for users wearing face masks.

iOS 13.5 was the first major public software release for the iPhone since March, but it wouldn’t be a software launch without a hiccup or two. MacRumors reported last Friday that some iOS users were experiencing a bug which made it impossible to open certain apps. The following error message began appearing on the screen for affected users: “This app is no longer shared with you.” Now, a potentially related bug is rearing its ugly head.

On Sunday, several iOS users took to the MacRumors forums to report that anywhere between 10 or 15 to hundreds of pending app updates were showing up on the App Store. This wouldn’t have been noteworthy on its own, but many of those updates were for the same version number of the app as the one that was already installed on their devices. In other words, Apple appeared to be reissuing updates for apps regardless of whether or not the user had already downloaded and installed those updates, but without providing any explanation.

As of Monday morning, Apple has yet to provide any updates on either of these issues, but MacRumors suspects that they might be related. If the “no longer shared” error had something to do with expired certificates, it might have been necessary for Apple to reissue the latest software updates to restore or refresh the certificates.

If you run into the sharing error and an update from the App Store doesn’t fix it, there is another way to get access to your app without losing any of your data or settings. Head to Settings > General > iPhone Storage and scroll down until you find the problematic app. Tap on it and then tap the Offload App button. You can then reinstall the app and pick up right where you left off. As long as you don’t run into the error on dozens of apps, it’s a fairly simple process and it shouldn’t take more than a few minutes to get everything back to normal.

Again, we’ve yet to hear anything from Apple about the “no longer shared” error or the bug that is forcing some users to re-update dozens or even hundreds of apps, but we’ll update this post if we do.

Android is finally copying one of the best things about iMessage on the iPhone

A single iPhone app is important that it might keep you hooked to iOS forever, and that’s iMessage. It’s an SMS alternative that Apple devised many years ago, the one that brought over the blue message bubbles to mobile, which become a key identifier for iPhone users.

iMessage works on iPad and Mac, offering the same set of rich texting features, and all communication is protected by end-to-end encryption. Apple never made an iMessage app for Android or any other platform, and Google has been struggling to come up with a similar alternative for many years. The latest attempt is called RCS (rich communication services), and it’s not available to Android users everywhere. Moreover, Google Messages is less secure than iMessage, as it doesn’t support end-to-end encryption, which is a key feature for messaging apps. Google is finally going to fix it, as it’s already testing full encryption on an internal build of Google Messages.

iMessage was the first to make end-to-end encryption popular among chat apps. What that type of encryption does is to ensure that only the sender and the recipient of the message can read it. It can’t be intercepted by hackers or accessed by the company.

Other apps, including WhatsApp and Signal, also offer end-to-end encrypted instant messaging. Facebook confirmed last year that all of its properties that can provide chat support, including Messenger, WhatsApp, and Instagram, will move to end-to-end encryption. With that in mind, Google can hardly afford not to match those offerings when it comes to mobile security standards.

End-to-end encryption is referenced in Google Messages 6.2.031, an internal app release first found by APK Mirror.

The folks at 9to5Google analyzed the code and found several traces where end-to-end encryption is clearly referenced. Here are a few examples:

<string name=”encrypted_rcs_message”>End-to-End Encrypted Rich Communication Service message</string>

<string name=”encryption_default_fallback_body”>”SMS/MMS texts aren’t end-to-end encrypted.nnTo send with end-to-end encryption, wait for improved data connection or send messages now as SMS/MMS.”</string>

As seen in the second example above, Google Messages will require an internet connection for the feature to work. Without cellular internet or Wi-Fi, iMessage fails as well and can fall back on SMS/MMS, which are unencrypted by default.

Google’s RCS platform will work similarly, and you’ll probably be able to customize your RCS experience. On the iPhone, you can choose not to send messages as SMS/MMS when there’s no internet.

The code also indicates that when sending location data to your contacts, the information will be encrypted. Also, you’ll be able to allow apps to access the contents of your messages.

Also, both parties might have to use Google Messages to take advantage of end-to-end encryption, although other RCS apps could also get support in the future.

It’s unclear when this particular version of Google Messages will be launched, or whether end-to-end encryption will be enabled soon. But it does look like the kind of security feature that could be advertised for Android 11.

  • « Previous Page
  • 1
  • …
  • 12
  • 13
  • 14
  • 15
  • 16
  • …
  • 28
  • Next Page »

Copyright © 2025 · Executive Pro Theme on Genesis Framework · WordPress · Log in